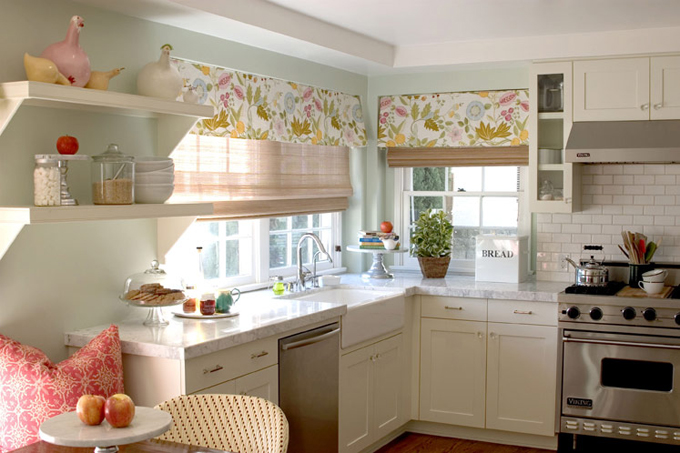
Saturday, 14 January 2012

Coastal Chic

I'm fortunate to live in one of the most beautiful areas in Australia. We have some of the most stunning beaches just a few minutes drive away from our home. Of course whenever you find stunning beaches you are also bound to find many stunning beach homes. As we are in the midst of Summer here in Australia, I thought I would post some photos of lovely homes that can only be described as "Coastal Chic".


Source Unknown

Source Unknown


Source Unknown


Source Unknown


In my opinion, if you are trying to obtain the coastal/beach feel in your home it is best to do it in a subtle way. Using coastal colours such as blues, greys, greens and sandy off-whites will reference the colours that you see in nature when you are by the ocean. Using bead board and pieces of coral as well as natural materials in furniture such as timber and rattan are excellent ways to achieve that coastal, holiday feel. Of course the most important thing to do is to make sure nothing is too perfect, after all spending time at the beach should make you feel relaxed, not uptight. One last point on coastal interiors - lots of sail boats and knotted nautical rope are perhaps best left in the past!

Thursday, 12 January 2012

Classic White Kitchens - Part 2

It has been a couple of months since I posted Classic White Kitchens - Part 1 so I thought I'd follow up today with Part 2.

I have been working on a project to update a local fisherman's cottage (I will hopefully post some photos of that project in the next couple of weeks). The owners wanted to update the old timber kitchen and of course using white is the best way to bounce light around and give the kitchen a more timeless feel.

White kitchens work well with all styles from traditional, right through to contemporary & modern. Using white as a backdrop also allows you to use pops of accent colour or as the first photo below demonstrates, you can easily add industrial elements to it.


Source Unknown


Source Unknown


I used many of these kitchens as inspiration for the little fisherman's cottage. White gives us a sense of happiness & ease and most importantly in a kitchen, allows us to see any spills that may have occurred!

Tuesday, 10 January 2012

Updating My Bathroom...How To Guide

Thanks for all the kind comments and questions about the bathroom. I've had a few emails from people asking if I'd painted the tiles and the other changes I'd made so I thought I'd write a post on it.

Firstly, yes I painted the tiles. Our tiles were in really good condition and none were chipped or cracked, so they were the perfect candidate for painting. I also painted the doors and drawers on the vanity as well as changing the handles to new ones. I also created the frame around the mirror.

If you are thinking of painting the tiles in your bathroom, I would highly recommend getting a professional painter in to do this for you, if your budget will allow for it.

If your budget won't allow for a professional painter then I will very upfront in saying it can be a long and very laborious exercise and once you put that first bit of paint on, there is no turning back! You should also know that when you are up close to the tiles i.e. standing in the shower or sitting in the bath you WILL be able to see that the tiles are painted. No matter how much care you take you will be able to see small brush strokes, it will never be as perfect as a ceramic tile. If you simply cannot stand to live with imperfections, then you need to engage in a full re-tile of your bathroom. Of course those of you who need glasses have the benefit of simply having your shower or bath sans glasses and presto, no problem!

The products I used were White Knight products. I was advised to use their Griplock primer as my tiles were black. I only needed one coat of the primer to cover most of the black. White Knight have a specialist Tile Primer and I would imagine its best for most tile painting projects, I doubt the world is full of black tiled bathrooms like the ones we inherited.

Now for the most important thing I learnt through this process - it is VERY important that your application of the primer is as smooth and flawless as possible! Don't overload your brush with excess primer or you will get runs and these will still be visible (albeit only up close) in your finished result. Take time putting on the primer and your end result will be that much better for it. I would also advise that you start with an area that is concealed, for example behind the bathroom door, until you get used to using the paint. The primer and tile paint are very different to the paint you use to paint your walls.

For the top coat I used the White Knight Tile Paint. I only needed two coats of this paint to end up with the result you've seen. White Knight recommend that the tile paint only be used on vertical surfaces, but I obviously decided to also do our tub deck. I am really careful to mop up any water that sits on the tub deck when we are finished with the bath (especially after my girls have been splashing around in there!)

You can also use the tile paint to paint on laminate surfaces which I did for the vanity doors and drawers as they were a light grey and I wanted them white. I also wanted to cover the wooden border on them.

I swapped the wooden knobs with new ones for the doors. These handles were a bought from my local hardware store and were actually a gold finish, which made them look quite horrible and dated. I simply sprayed them with some black spray paint I had.


I created the mirror frame from lengths of decorative timber moulding. These are also able to be purchased, for a reasonable price, from large hardware stores. I'm proud to say that I cut the corners myself, using a mitre box and saw. Then they had a date with my can of black spray paint! Remember to spray both sides of the timber when creating a frame for a mirror, or you will see the unpainted wood in the reflection.


The curtains are called Eivor and are from IKEA, as is the curtain rod.


Here is a quick budget breakdown:

Griplock Primer (2 cans) - $52.00
Tile Paint (2 cans) - $132.00
Mirror Frame (wood) - $70.00
Eivor curtains - $29.99 for the pair!
Vagen Curtain rod - $14.99
Door Handles - $24.00
Drawer Pulls - $24.00
TOTAL: $346.98

The rest of the items I needed such as paint brushes, masking tape etc. I already had, so I didn't need to factor those in. I also already owned all the accessories so this wasn't included in my budget either.

I hope this helps those of you wanting to do something similar in your bathrooms.

Monday, 9 January 2012

The Updated Bathroom...finally!

Sorry for the extra time it has taken to post the bathroom update...it was a very hectic end to 2011!

As you may remember from my previous posts about the bathroom, it was pretty ugly, here is a little reminder:


And now...


I've been really pleased with the result, especially considering it cost less than $350 (excluding the accessories which I already owned). It will definitely serve it's purpose for another year or so until we are ready to undergo a full renovation - at which point I will completely alter the layout!


P.S - Apologies to all the photographers out there for the quality of the photographs, clearly I was NOT a born photographer!

Wednesday, 4 January 2012

Aura by Tracie Ellis

A quick post to talk about Aura by Tracie Ellis. Aura is one of my favourite Australian brands for bed linen, cushions and throws. Tracie also has a great collection of table linens and kaftans available.

Aura currently has a sale on where you can pick up quilt covers from $50! Below are some of my favourite items available on their site at the moment.


A - Zaha cushion in Charcoal
B - Tyra cushion in Peacock
C - Inka cushion in Olive
D - Seville cushion in Coal
E - Ena placemats in Sea Blue
F - Ankita Kaftan available in Sml, Med & Lge


Monday, 2 January 2012

Happy New Year!

Like everyone else, I'm really not sure how 2011 managed to slip by so quickly, but overall it was a great year and I'm exceedingly looking forward to all that 2012 will hold!

Now, I know that I promised some update photos of my bathroom and I will post them soon but I've had a house full of guests over the holiday period and as we haven't seen them for 5 years I've been taking time out to enjoy spending time with them before they head back to England at the end of the week.

Those of you who read design blogs or are in the industry will be aware that the Pantone Colour of the Year for 2012 is Tangerine Tango. It's a bright and happy colour and when used in a big way will definitely make a BIG statement. For most people who wish to use it, it can make a lovely accent colour in a room.


So there you have it, the Pantone colour of the year. If and how you choose to use it is completely up to you!